The Anatomy of a Violin: A Beginner’s Guide to Parts & Setup

Anatomy of the Violin
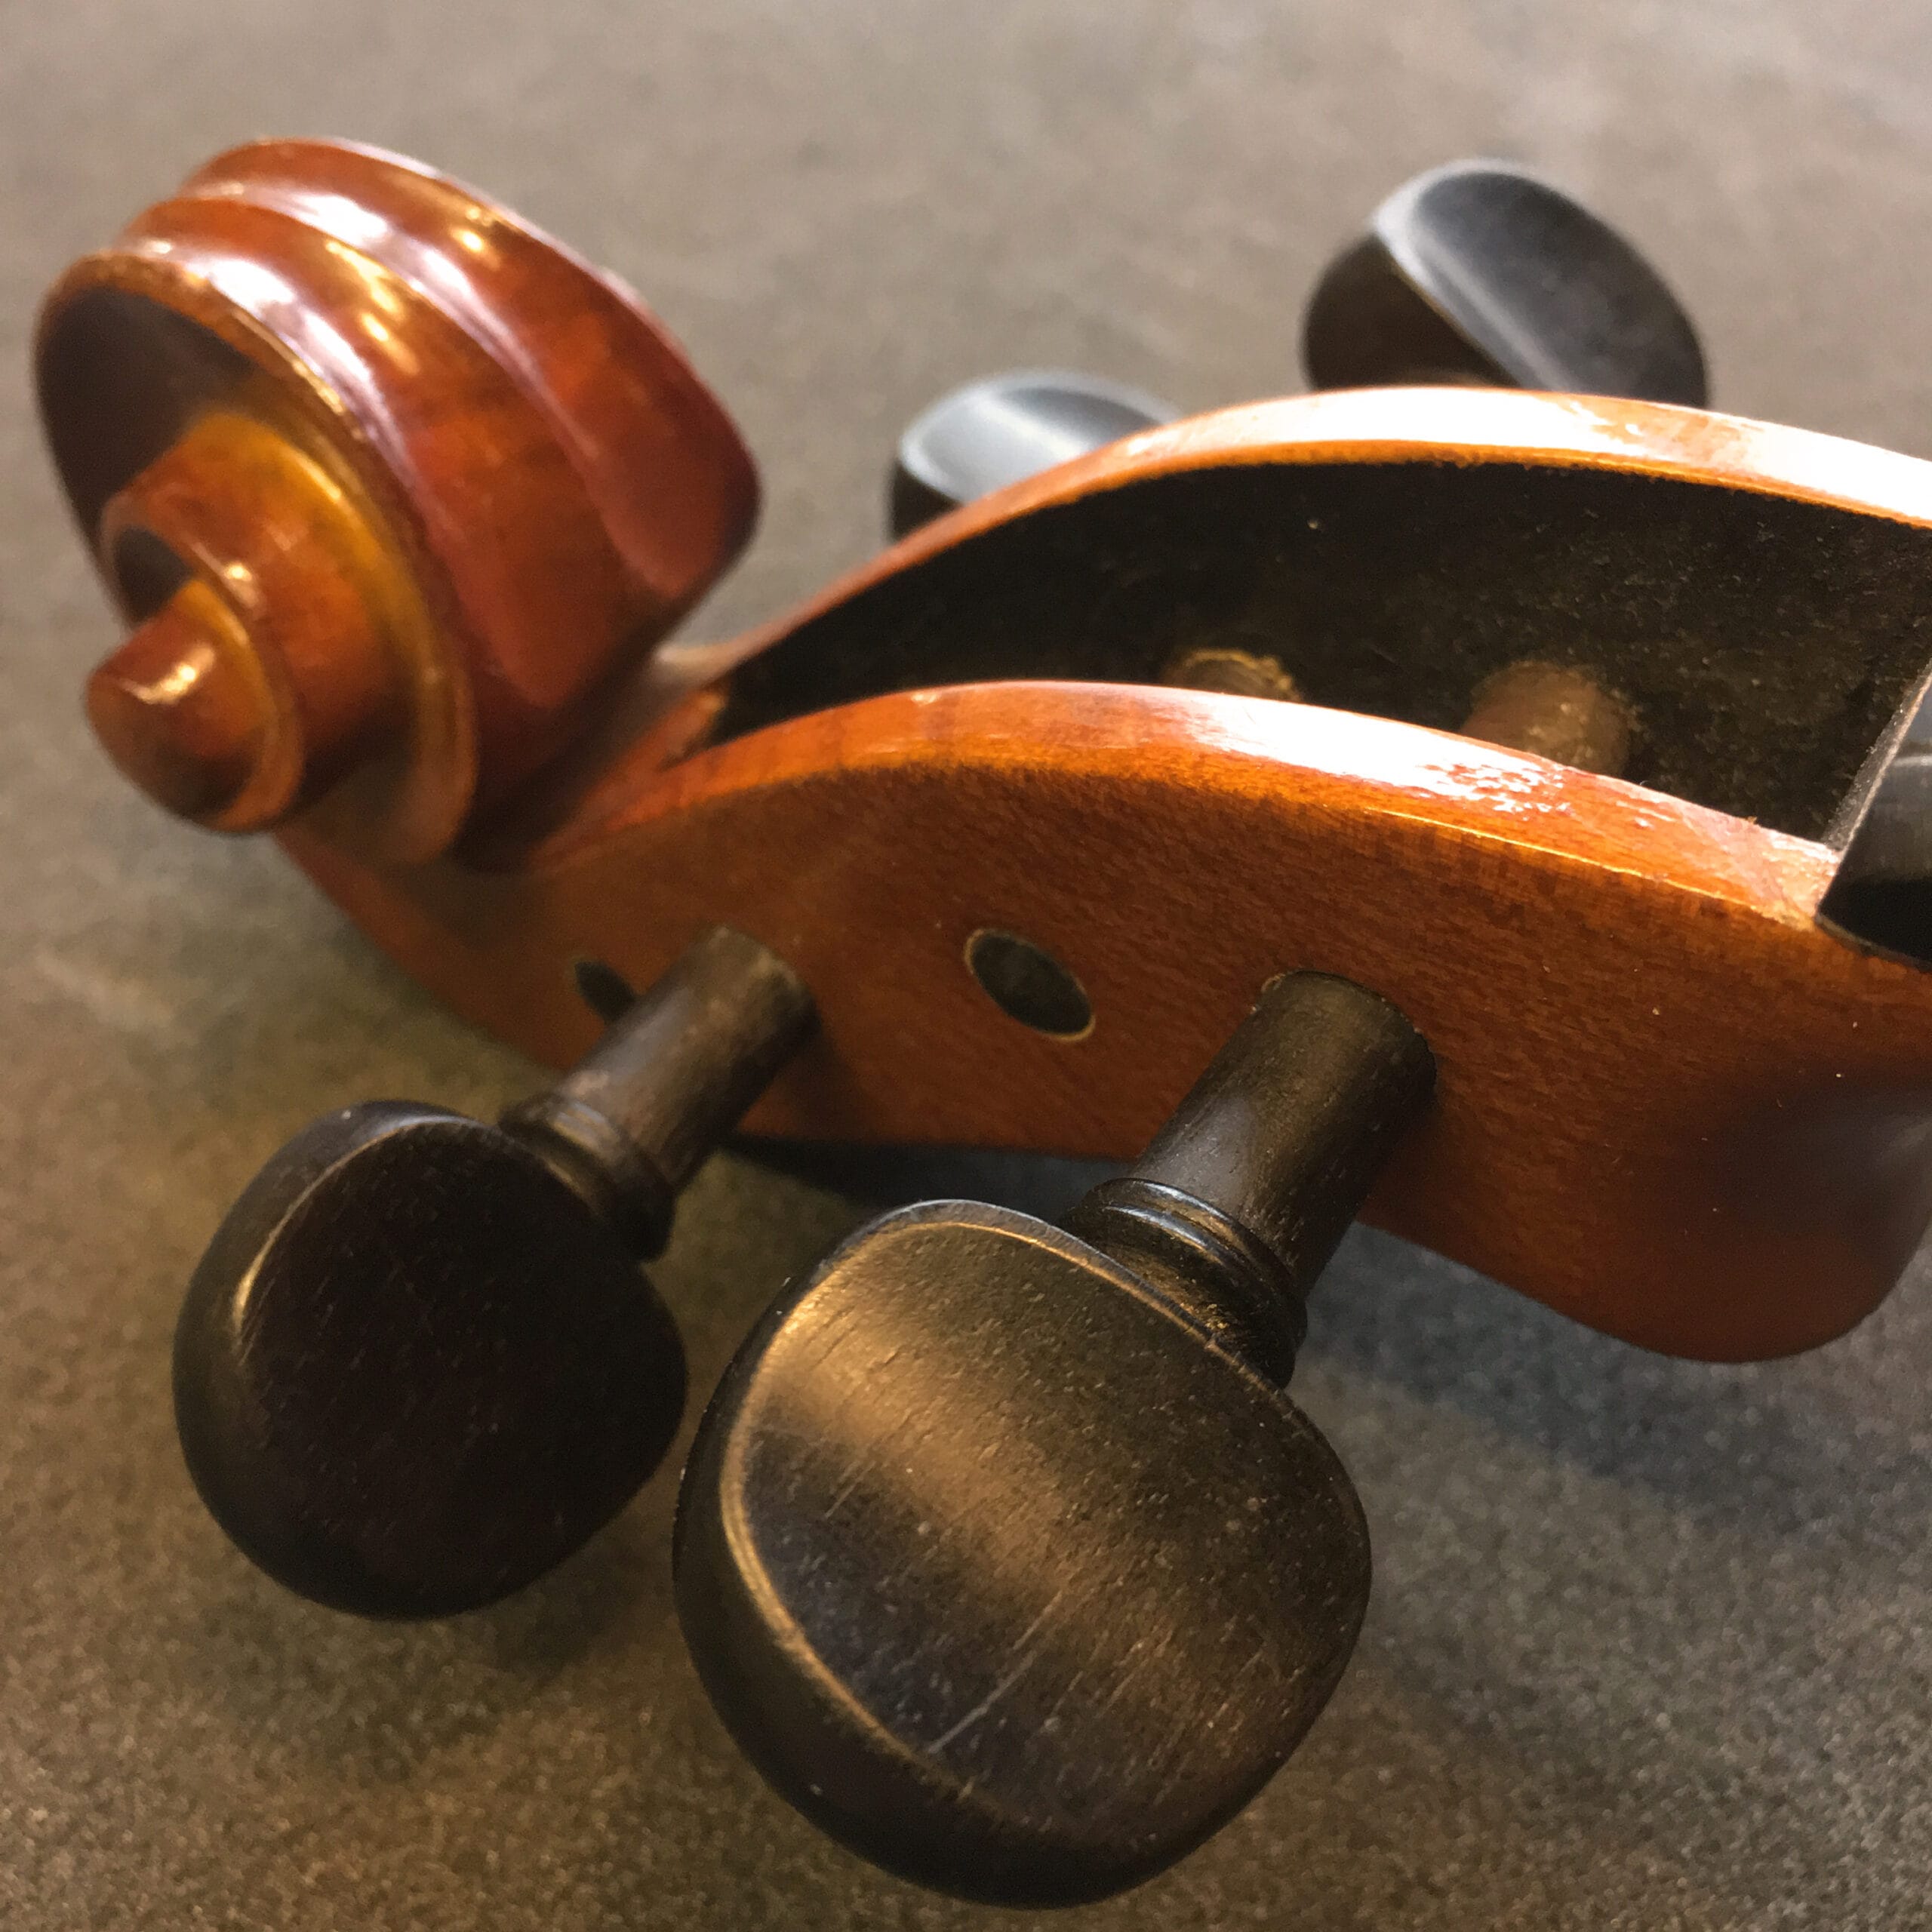
1. The Scroll
The carved decorative end of the violin. Purely aesthetic, but a sign of a well-finished instrument.
2. Tuning Pegs
Used to tune the strings. Our Hire Quality: We ensure these are fitted perfectly so they don't slip.
3. The Nut
The small groove that holds the strings in place before they reach the pegs.
4. The Strings
Usually steel, synthetic, or gut. We use high-quality student strings for a warmer tone.
5. Fingerboard
The ebony surface where you press notes. Needs to be smooth for clear playing.
6. F-Holes
The openings in the body that allow sound to escape. They act like a speaker's port.
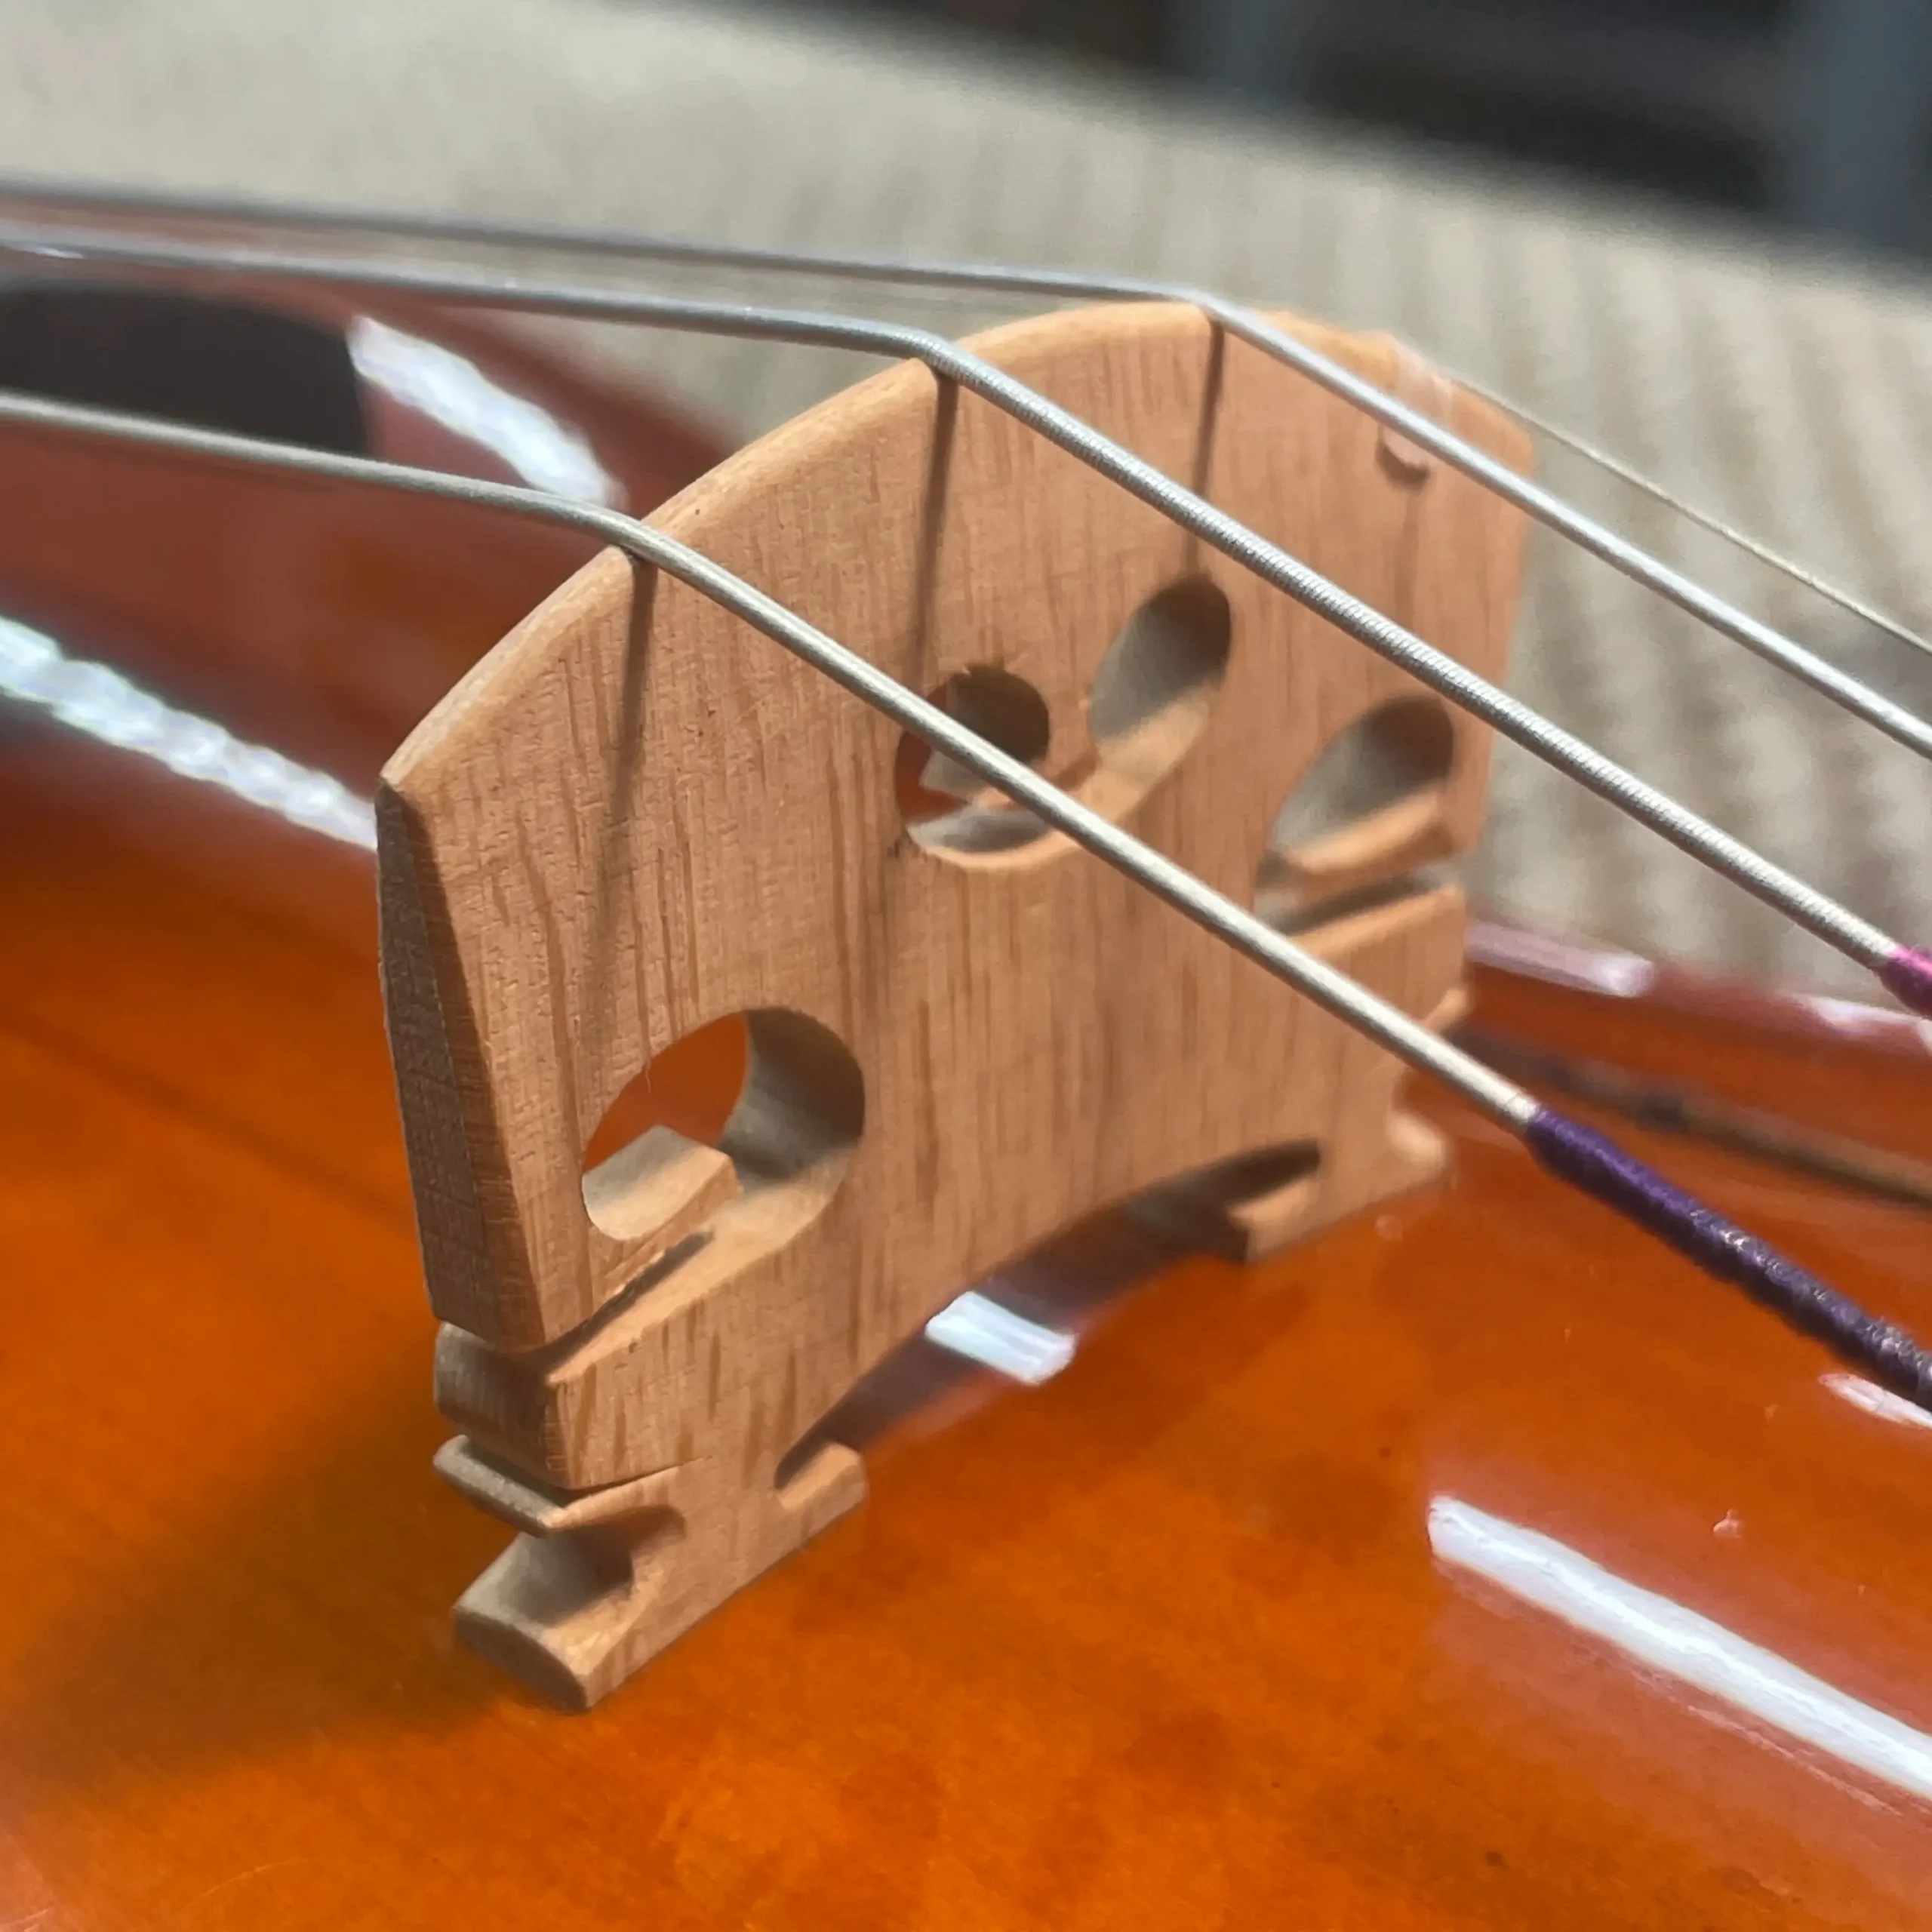
7. The Bridge
Held by tension. Note: Our hire bridges are hand-carved to the correct height for beginners.
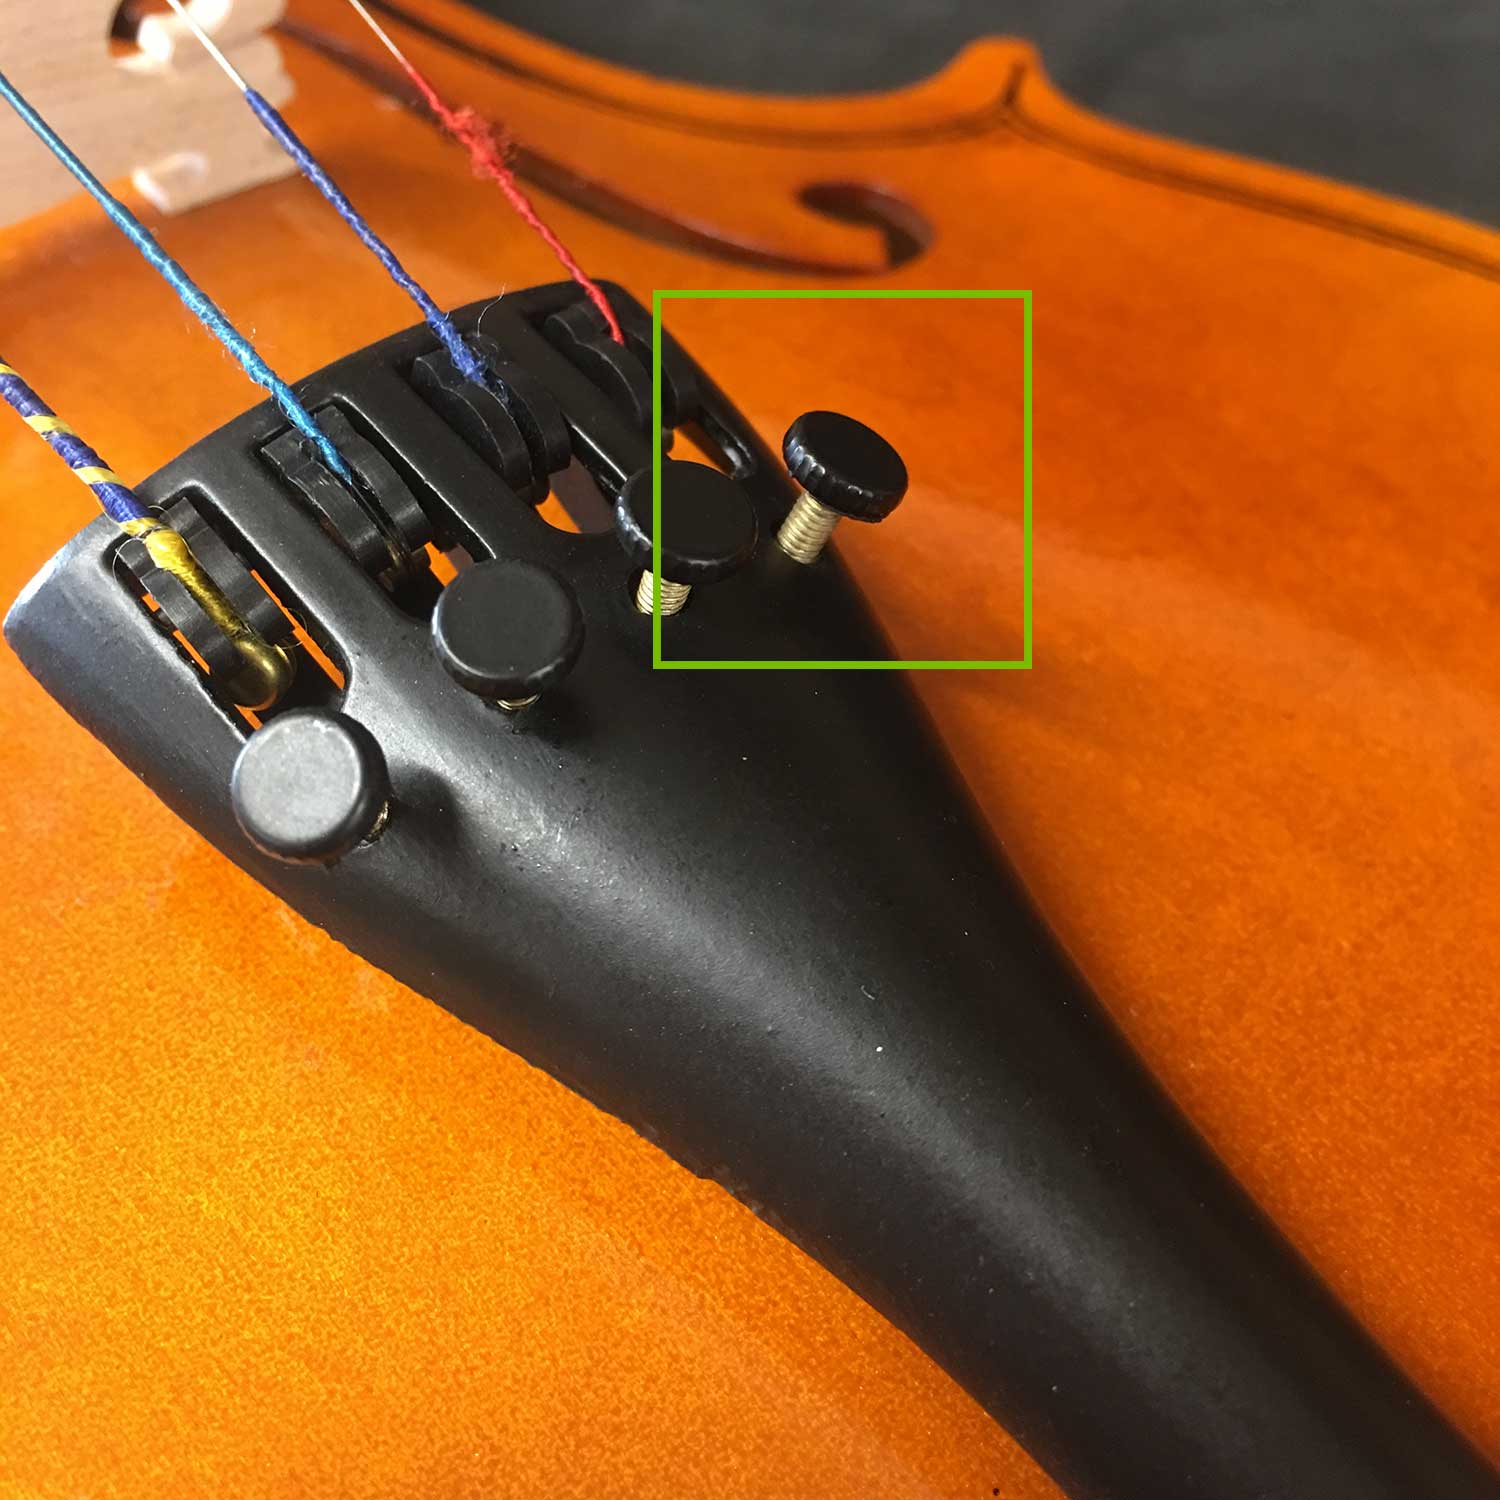
8. Fine Tuners
Small screws on the tailpiece for precise tuning without using the pegs.
9. Tailpiece
The anchor for the strings at the bottom of the violin.
10. Chin Rest
Helps the player support the violin with their jaw/chin. Ergonomically fitted on all our hires.
11. The Body (Table)
Usually made of Spruce (top) and Maple (back/sides) to create resonance.
12. Endpin
The small button at the bottom that holds the tailpiece gut in place.
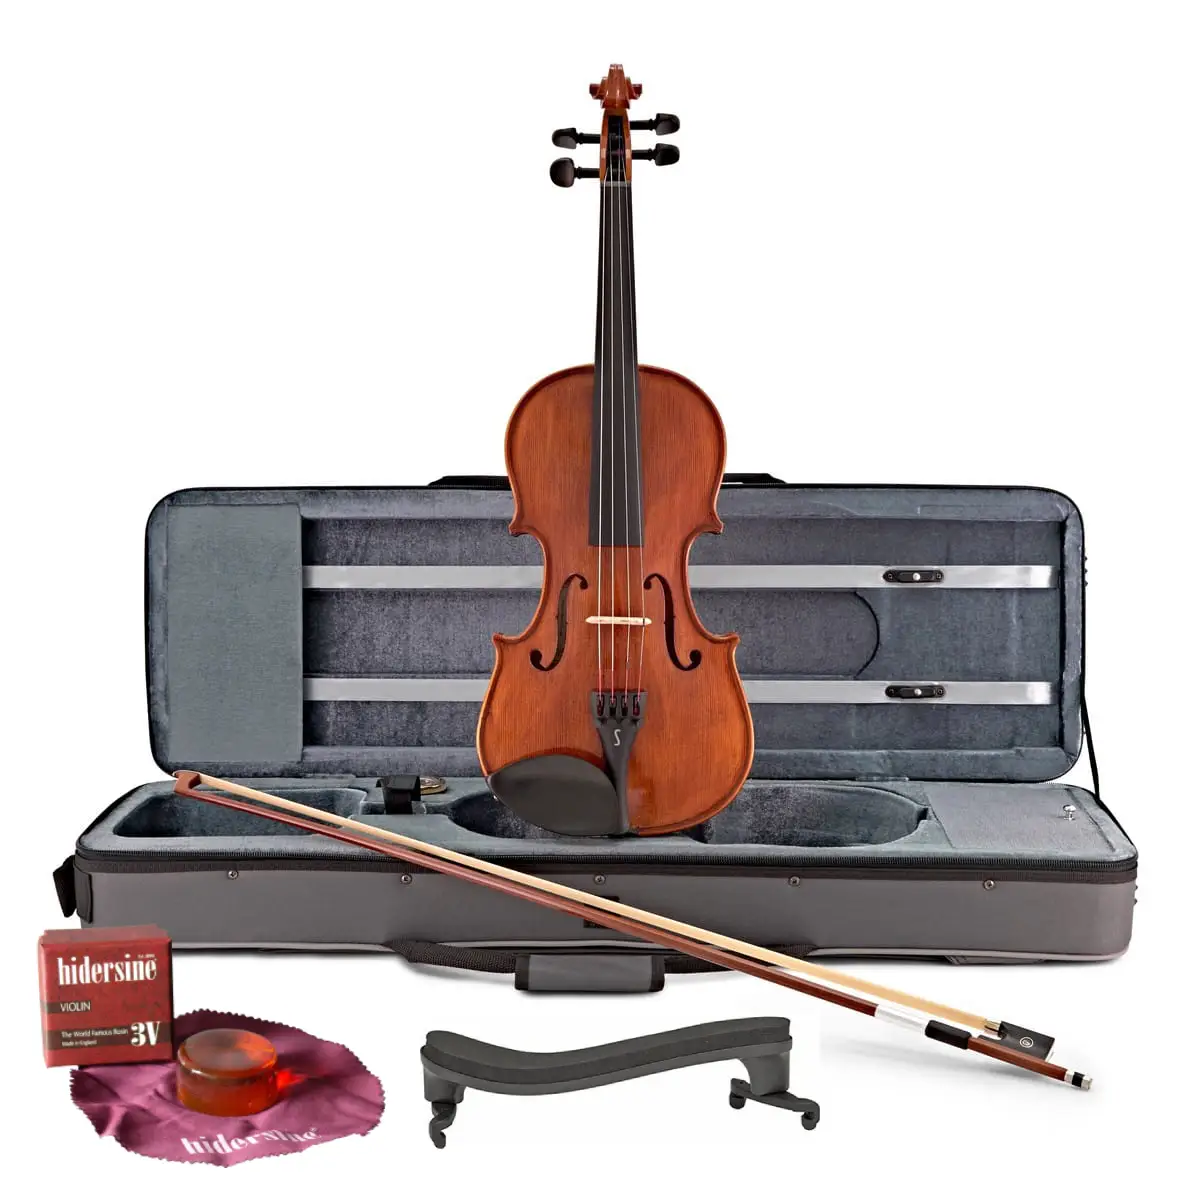
Need a violin that's ready to play?
Don't worry about bridges, pegs, or fine tuners. Our luthier-checked violins arrive perfectly set up for your first lesson.
Explore Violin Hire Options →Our Hire Quality Standards
See the professional setup included with every rental instrument.