
Welcome to Musical Instrument Hire! Whether you’ve just received your violin or are about to start, we’re here to help you get off to a smooth start.
Our instruments are very rarely damaged in transit, but it’s a good idea to check the violin and its accessories when they arrive. Any major damage should be easy to spot. If you notice anything unusual, please contact us right away so we can assist.
Before you start playing, we recommend following the simple steps below to ensure your violin is properly set up and ready to play.
On this page...
Parts of the violin
Before you begin, it’s helpful to familiarise yourself with the different parts of the violin. The accompanying image highlights the main components and will help you follow written instructions and visual guides as you take your first steps into playing.

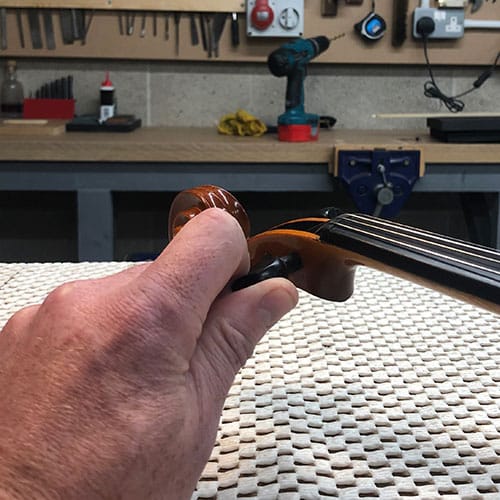
Bridge Position

Firstly, check the position of the bridge. It should sit centrally on the body of the violin and line up with the edges of the fingerboard.
Hold the bridge on both sides between your thumb and fingers, and gently slide it into the correct position if needed.
Bridge Angle
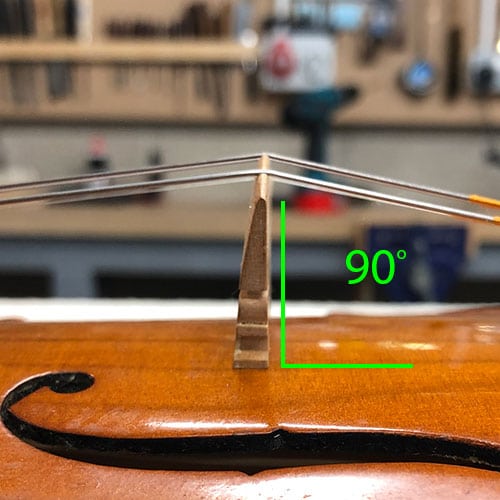
Secondly, check the angle of the bridge. When viewed from the side, the bridge should stand upright at a 90-degree angle to the body of the violin.
Hold the bridge with both hands, placing your thumbs and fingers near the top of the bridge under the strings, and gently rock it back into an upright position if necessary.
Shoulder & Chin Rest
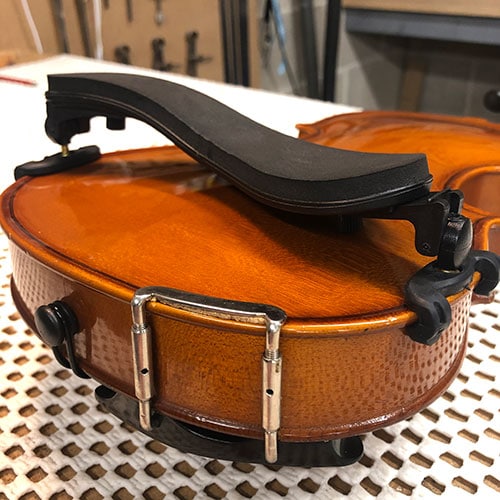
The chin rest has already been fitted to the violin and is unlikely to have moved.
The shoulder rest comes separately and needs to be fitted.
It has limited flexibility which allows for it to be ‘stretched’ over the body of the violin. The scooped area of the shoulder rest fits on the same side of the violin as the chin rest.
Bow Hair Tension
The bow is never tensioned during storage, so when it arrives the bow hair may appear slightly slack. This is normal and simply means tension needs to be applied before playing.
To increase the tension, turn the screw at the end of the bow clockwise until you can fit either a pencil or your fourth (little) finger snugly between the bow hair and the bow stick. If the bow is overtightened, you will see a much larger gap between the two.
When correctly tensioned, the bow stick should always retain a gentle curve.


Violin Bow Rosin
Rosin has already been applied to the bow, so it is ready to use on arrival. However, it will need topping up from time to time—once or twice a week is usually sufficient. Over time, rosin wears away naturally, and without it the bow will not produce any sound.
To reapply rosin, firmly rub the rosin along the full length of the bow hair. Only a thin, even layer is required. Applying too much rosin can damage the bow hair, wear out the strings, and cause the bow to become sticky.
A bow should not normally need cleaning. If it does become sticky due to excess rosin, it must be cleaned by a technician. We do not recommend attempting to clean the bow yourself.
Occasionally, a loose hair may come away from the bow, similar to a loose thread on clothing. This can be gently pulled away from the end. If the bow hair falls out frequently without being pulled, the bow will need repairing.
All bows are fragile and should be handled with care. They must never be used for any purpose other than playing the violin.
Tuning Your Violin
How the Violin Is Tuned
Before leaving our workshop, your violin is carefully tuned. However, tuning can change slightly during transit. It may still be in tune, but it is common for the strings to be a little flat. In most cases, only very small adjustments are needed.
Ideally, a music teacher should help with tuning, especially for beginners. If this isn’t possible, you may wish to use an electronic tuner or download a tuning app (free or paid). These usually include simple, step-by-step instructions.
If a violin is severely out of tune, it should be adjusted by a professional rather than attempting to correct it yourself.
The Basics of Tuning a Violin
A string that is out of tune will sound either sharp (higher than it should be) or flat (lower than it should be). Tightening a string makes the note sharper, while loosening it makes the note flatter.
There are two ways to tune a violin:
1. Fine tuners – located on the tailpiece, ideal for small adjustments.
2. Pegs – at the top of the violin, used for larger changes in pitch.
Fine Tuners
If the violin is only slightly out of tune, the fine tuners can be used.
Turn the screw clockwise to tighten the string and raise the pitch.
Turn the screw anticlockwise to loosen the string and lower the pitch.

Pegs
The pegs are used for larger adjustments to the violin’s tuning.
Turn a peg anticlockwise to tighten the string and raise the pitch.
Turn a peg clockwise to loosen the string and lower the pitch.
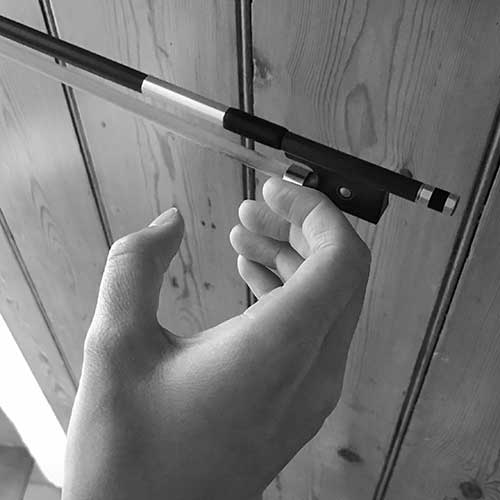
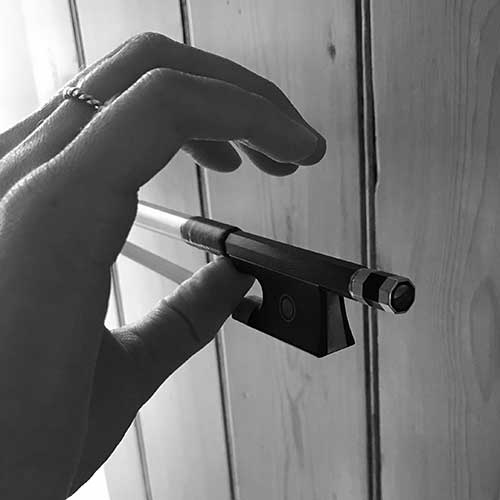
Holding the bow
It is essential to hold the bow correctly from the outset as bad habits are easily formed and will certainly need to be corrected at a later date.
The basic bow hold can be achieved by pretending to hold a water bottle and slowly pouring it out. Notice the hand position; this is the correct position! Now hold the water bottle on its side and if the fingers are together then separate them slightly, ensuring that there is a small space between them, whilst keeping the thumb bent.
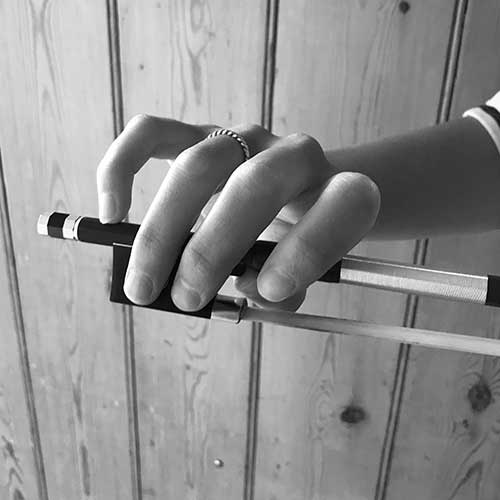
Do not hold too tightly. A loop should be visible between the thumb and middle finger. The little finger rests on top of the bow and can be lightly tapped up and down to demonstrate that it is not being used to grip with. During play the little finger remains on the bow.
As play commences all fingers on the bow should feel relaxed to prevent the fingers from aching. It is important for a child to learn to hold the bow correctly. Limiting the time they spend holding the actual bow is helpful. They can practice the technique more frequently with a pencil.

Summary
By following these steps, you’ll ensure your violin is set up correctly, the bow is ready, and the strings are in tune. Regular checks and proper care will help your instrument stay in great condition and make learning to play more enjoyable. If you need further guidance, refer to the detailed instructions above or contact us—we’re always happy to help.